When I first started playing with whipcording, I cobbled together some bobbins to make do. I based them on bobbin-lace bobbins – long and narrow, with decorative beads on the end to add weight to the bobbin and maintain tension on the fiber. They work well enough, and I’ve probably braided over 100 yards so far for various cording projects with no major issues. The most recurring problem I have with my current set is that the top of the neck is too shallow compared to the head, and the knot anchoring the fiber to the neck is prone to slipping off the top. It’s not a terribly disruptive problem, but it gets annoying.
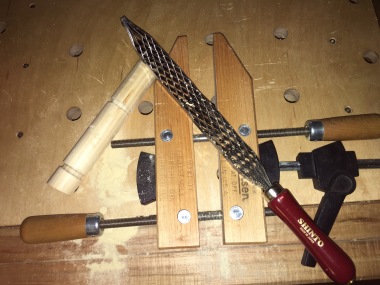
 My woodworking hobbyist husband plans to get a small lathe for his shop someday. When that happens, I’ll make myself a set of turned bobbins. But until then, I wanted to try to carve a set of nice, heavy whipcording bobbins for a Kingdom Artists’ Exchange. Using multiple kinds of rasps and files, I sculpted a few trial bobbins to test out proportions and techniques. Still thinking in terms of lace bobbins, I started with 5/8″ dowels. These proved too light-weight on their own, and one even snapped at the neck during carving! Something more robust would be needed for proper slyngyng.
 For the next set, I used much stouter 1 1/4″ dowel cut into 8″ pieces. I marked 1″ for the head, and 3″ for the handle. This left about 4″ for the neck – long enough to hold a good amount of fiber and still leave a handle that fits comfortably in the hand for two-person whipcording, and offers good tension weight for solo cording. These proportions are functionally balanced and aesthetically pleasing as well.
In my early attempts, I found that the coarse rasp that I used to hollow out the neck was difficult to control at the upper and lower boundaries of the neck. As soon as I got into a nice rhythm with the rasp, it would skip over onto the head or handle, marring the edges. Using a round file to score a deep groove at the top and bottom of the neck made containing the rasp much easier and produced significantly cleaner shoulders.
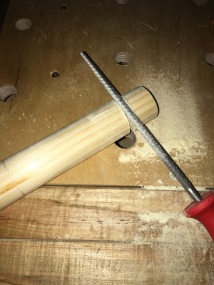
Bracing the coarse rasp in a screw clamp, I drew the bobbin over the teeth to rough out the neck about 1/4″ deep on four sides. I then braced the the bobbin in a table clamp and used the medium-toothed side of the rasp to sculpt the neck into a cylinder.


Next was checking the width along the neck and using a fine, flat file to smooth any lumps and irregularities.


Finally, I used the course rasp, medium rasp, and flat file to shape the top of the head and round off the shoulders and base of the handle. I used the round file to flatten and even out the underside of the head where the half-hitch will rest when the bobbin is strung. A nice polish with sand paper cleaned up any left-over marks and finished the bobbins. As a final touch, I carved ermine spots and cat paw prints on the handles, since ermine spots and a cat are major elements in her SCA heraldic arms. (While the entirety of the work thus far – from cutting the dowel to carving the bobbins – had been done with simple hand tools, I cheated here and used a Dremel Tool to carve the decorations.)


While the final set of whipcording bobbins aren’t perfectly symmetrical or identically matched, overall I am quite pleased with the results. They have a rustic, primitive look to them, as if they may have been recovered from an Iron Age village rather than a Renaissance, merchant-class, urban neighborhood. Functionally they work very well. The securing twist has plenty of room to tuck up against the bobbin head and not slip off. The weight swings smoothly and evenly. There is lots of room on the neck to spool fine or bulky fiber. And they make a pleasant clacking sound as they hit against each other while braiding. They will do well for both solo and two-person whipcording projects.
I had fun and learned a lot making these. I think I will wait for the lathe before I make any more – this was a fair amount of work grinding away the shapes on the practice pieces and the final project, and my shoulders were not happy for a day or so. But it was well worth it for the experience of slowly uncovering the bobbins hidden in the wood. I hope the lady who receives this set will have as much fun exploring whipcording as I did exploring woodworking.

